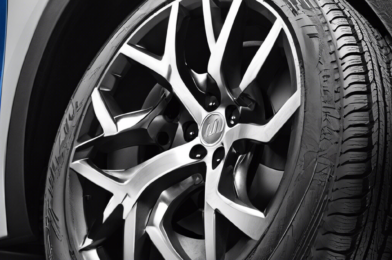
Fall Car Care: Prepare for Changing Weather with These 5 Steps

As the leaves begin to turn and the temperatures drop, it’s a reminder that now is the time to start preparing your car for the changing season. Fall car care is essential to ensure your vehicle is ready for the cooler weather and the challenges that come with it. From checking your car’s vital fluids to inspecting its exterior, here are five essential steps to get your car ready for fall.

**1. Check your car’s fluids**

One of the most important things you can do for your car is to check its fluid levels regularly. This is especially important as the weather starts to turn cooler. Start by checking your engine oil level. Remove the dipstick, wipe it clean, and reinsert it to get an accurate reading. Make sure the oil level is within the acceptable range and that the oil itself is a amber or golden color. If it looks dark or dirty, it may be time for an oil change.

In addition to engine oil, check the levels of other vital fluids, including coolant, brake fluid, power steering fluid, and windshield washer fluid. These fluids play a critical role in the safe operation of your vehicle and should be topped up or replaced as necessary. Coolant, in particular, is crucial as it prevents your engine from freezing in cold weather. Refer to your car’s owner’s manual for information on the recommended types and amounts of fluids to use.

**2. Inspect your tires**

The changing seasons can be hard on your tires, so it’s important to give them some extra attention. Start by checking the tire pressure, ensuring it matches the manufacturer’s recommendation, which you can find on the driver’s side door jamb or in the owner’s manual. Tire pressure tends to fluctuate with the temperature, so it’s important to keep an eye on it. Proper inflation will not only ensure a smoother ride and better handling but will also help improve fuel efficiency.

Don’t forget to inspect the tread depth of your tires as well. A simple penny test can help you determine if your tires have sufficient tread. Place a penny into the tread grooves, with Lincoln’s head upside down and facing you. If you can see the top of Lincoln’s head, it’s time to consider replacing your tires, as the tread is too shallow and may not provide enough traction on wet or icy roads.

**3. Test your lights and signals**

With fall bringing shorter days and longer nights, ensuring your car’s lights and signals are in good working order is crucial for your safety and visibility on the road. Check all exterior lights, including headlights, taillights, brake lights, turn signals, and emergency hazard lights. Make sure they are clean and functioning properly. Replace any burnt-out bulbs, and keep spare bulbs in your vehicle in case you need to make a quick replacement.

Additionally, take a moment to ensure your headlights are properly aimed. Misaligned headlights can reduce your visibility and blind other drivers, so it’s important to have them adjusted if necessary. Many auto parts stores offer headlight aiming services, or you can refer to your car’s owner’s manual for instructions on how to do it yourself.

**4. Prepare an emergency kit**

As the seasons change, it’s a good idea to update your car’s emergency kit to reflect the potential challenges of fall and winter driving. In addition to the standard items, such as a first aid kit, jumper cables, and a flashlight with fresh batteries, consider adding some seasonal items. These could include an ice scraper and snow brush, a small bag of sand or cat litter (for traction if you get stuck in snow or ice), a warm blanket, a flashlight, and some non-perishable snacks and water. It’s also a good idea to keep a basic tool kit and a portable phone charger in your vehicle.

**5. Give your car a thorough cleaning**

Fall is the perfect time to give your car a deep clean, both inside and out. Start by washing and waxing the exterior to remove any built-up dirt, grime, and pollen from the summer months. This will not only make your car look its best but will also protect the paint and finish from the elements. Don’t forget to clean the wheels and tires, as they can accumulate brake dust and road grime.

The interior of your car deserves some attention, too. Vacuum the floors and upholstery, and use a soft cloth to wipe down the dashboard and other hard surfaces. Consider using a mild cleaner or a dedicated interior car cleaning product to remove any built-up grime. Don’t forget to clean the windows, both inside and out, to ensure optimal visibility while driving.

By following these five steps, you can confidently prepare your car for the changing weather and ensure safe and enjoyable driving throughout the fall season. Taking the time to perform these maintenance tasks now can help prevent unexpected breakdowns and costly repairs down the road. So, roll up your sleeves, grab your tools and cleaning supplies, and get ready to give your car some well-deserved TLC!

Smoke Signals: Understanding Exhaust Colors and What They Mean

# Smoke Signals: Decoding the Meaning Behind Exhaust Colors

We often associate colorful smoke with celebration and excitement, whether it’s the vibrant hues of fireworks or the colorful smoke bombs used in photography. However, when it comes to our vehicles, colorful exhaust smoke is usually a cause for concern. Understanding the meaning behind these unexpected pigments can help diagnose potential problems and save you from costly repairs or breakdowns.

Each color of exhaust smoke signifies a different issue, and being able to recognize these signs can make all the difference in keeping your car running smoothly. So, the next time you see smoke billowing from your exhaust, take note of its color and what it might be trying to tell you. Here’s your guide to interpreting these smoke signals:

## White Smoke

*Coolant Leak*: If you see white smoke coming from your exhaust, it could indicate a coolant leak. This usually happens when the coolant, or antifreeze, burns. Coolant leaks can be caused by a blown head gasket, a damaged cylinder head, or a cracked engine block, all of which are expensive repairs. If you suspect a coolant leak, check your coolant reservoir and radiator for low levels, and look for signs of leakage.

## Blue Smoke

*Oil Burning*: Blue smoke is a sign that your engine is burning oil. This could be due to worn-out piston rings, valve guides, or cylinder walls, which allow oil to seep into the combustion chamber. It could also indicate that your engine is overdue for an oil change. Operating your vehicle in this condition can cause irreversible engine damage, so it’s essential to address the issue promptly.

## Black Smoke

*Excessive Fuel Burn*: Black smoke indicates that your vehicle is burning excessive fuel. This typically happens when there is an imbalance in the air-to-fuel ratio, causing the engine to consume more fuel than necessary. Faulty injectors, a clogged air filter, or problems with the mass airflow sensor are common culprits. Black smoke is more common in diesel vehicles and can lead to reduced fuel efficiency and increased emissions.

## Gray or Brown Smoke

*Transmission Fluid Burning*: Gray or brown smoke often indicates an issue with your transmission fluid. When transmission fluid burns, it can emit a distinct odor and cause the exhaust smoke to take on a grayish or brownish hue. This could be a sign of a transmission fluid leak, or it may indicate that your transmission fluid needs to be changed.

## Thick, White Smoke

*Water Condensation*: Thick, white smoke coming from your exhaust pipe, especially upon startup or in cold weather conditions, is usually nothing to worry about. This type of smoke is typically caused by water condensation in the exhaust system, which occurs naturally during the combustion process. The smoke should clear up as your engine warms up.

It’s important to pay attention to any unusual colors or amounts of smoke coming from your exhaust, as they can be indicators of larger issues. While some causes, like water condensation, are normal and harmless, others can signify the need for immediate attention and repairs. Staying vigilant and addressing issues promptly can help keep your vehicle running smoothly and safely for years to come.

So, the next time you see smoke signals from your exhaust, don’t ignore them. Take note of the color, smell, and any other unusual behaviors, and consult a trusted mechanic for advice and repairs. Remember, when it comes to car maintenance, it’s always better to be safe than sorry!

Is there anything that I can help you with, such as generating additional content or making changes to the article?

Brake Overhaul: DIY Guide to Replacing Pads and Rotors

# Brake Overhaul: A Step-by-Step Guide to Replacing Pads and Rotors

## An Essential Maintenance Task for Vehicle Safety

By Jennifer Taylor

Replacing your brake pads and rotors is an essential maintenance task to ensure your vehicle’s safety and performance. While it may seem like a daunting task, with the right tools, knowledge, and patience, it can be a rewarding DIY project. Over time, brake pads wear down and rotors can become warped or damaged, leading to decreased braking performance and potentially dangerous situations. In this step-by-step guide, we’ll walk you through the process of overhauling your brakes, covering everything from the tools you’ll need to the specific steps for a successful replacement.

**Step 1: Gather the Necessary Tools and Materials**

Before you begin, ensure you have the right tools and materials for the job. Here’s a list of what you’ll need: new brake pads and rotors, a jack and jack stands, lug wrench, old rags or towels, brake grease or anti-seize compound, torque wrench, Allen keys or socket set, C-clamp or caliper piston tool, and safety gear, including gloves and eye protection.

**Step 2: Loosen the Lug Nuts and Lift the Vehicle**

Start by loosening the lug nuts on the wheel you’ll be working on with the lug wrench. Then, use the jack to lift the vehicle and securely support it with jack stands. Make sure the vehicle is stable and won’t shift or lower unexpectedly.

**Step 3: Remove the Wheel**

With the vehicle securely lifted, remove the lug nuts and take off the wheel. Set it aside in a safe place, and cover the fender and surrounding areas with old rags or towels to protect them from dirt and scratches.

**Step 4: Inspect the Brake System**

Before removing any components, take a moment to inspect the brake system. Look for signs of damage, leaks, or excessive wear. Check the condition of the brake pads, rotors, calipers, and hydraulic lines. If you notice any significant issues beyond normal wear and tear, consult a professional mechanic.

**Step 5: Remove the Caliper and Bracket**

Using the appropriate Allen keys or sockets, remove the caliper mounting bolts and carefully lift the caliper off the rotor. Suspend the caliper with a wire or bungee cord to prevent strain on the hydraulic line. Then, remove the caliper bracket mounting bolts and take off the bracket, being mindful of any guide pins or clips.

**Step 6: Replace the Brake Pads**

With the caliper and bracket removed, you can now access the brake pads. Carefully pry the old pads out of the caliper bracket, taking note of their orientation for reinstallation. Clean the bracket and inspect it for any damage or wear. Apply a thin layer of brake grease to the back of the new pads and insert them into the bracket, ensuring they are properly seated and aligned.

**Step 7: Replace the Rotors**

To replace the rotors, you’ll need to remove the mounting screws or bolts holding them in place. Carefully lift the old rotor off the wheel hub and set it aside. Clean the hub surface and inspect it for any damage. Install the new rotor, ensuring it is securely mounted and aligned properly.

**Step 8: Reinstall the Caliper and Bracket**

Before reinstalling the caliper, you may need to compress the piston using a C-clamp or caliper piston tool. This is necessary to create space for the thicker new brake pads. Carefully slide the caliper over the new pads and secure it in place with the mounting bolts. Reinstall the caliper bracket, making sure all guide pins and clips are properly seated.

**Step 9: Torque the Fasteners**

Using your torque wrench, tighten all the fasteners to the manufacturer’s specified torque values. This ensures that the components are securely fastened without overtightening, which can cause damage.

**Step 10: Pump the Brakes**

With the new pads and rotors installed, lower the vehicle and hand-tighten the lug nuts. Pump the brakes a few times firmly to seat the pads against the rotors. Then, properly torque the lug nuts and lower the vehicle to the ground.

**Step 11: Test and Safety Inspection**

Before driving, test the brakes to ensure they are functioning properly. Start the vehicle and press the brake pedal slowly and firmly several times. Listen for any unusual noises and pay attention to the brake pedal feel. If everything feels and sounds normal, you can take your car for a short drive to further test the brakes.

**Additional Tips and Precautions:**

– Always work on one side of the vehicle at a time to use the other side as a reference.
– Keep track of the order in which you remove components, and reinstall them in the reverse order.
– Clean all components before reassembly, and ensure no dirt or debris enters the brake system.
– Never reuse old brake pads or install pads with uneven wear.
– If you encounter any issues beyond your expertise, consult a professional mechanic.

By following this guide, you can confidently replace your brake pads and rotors, ensuring your vehicle’s braking system is in optimal condition. Remember to take your time, work safely, and always refer to your vehicle’s specific repair manual for additional instructions and torque specifications.

We hope this article empowers you to tackle your brake maintenance with confidence and helps keep your vehicle safe and reliable. Happy wrenching!

Tire Care 101: Extend Your Tread Life and Save Money

## Tire Care 101: Your Guide to Longer-Lasting Tires and Savings

Taking care of your tires is about more than just safety on the road – it’s also about saving money. Proper tire care can extend the life of your tires, postponing the costly expense of replacing them. Not only that, but well-maintained tires can also improve your vehicle’s fuel efficiency, saving you money at the pump. So, let’s dive into the world of tire care and explore the simple steps you can take to get the most out of your tires.

First things first: check your tire pressure regularly. Underinflation is one of the biggest contributors to shortened tire life. When your tires don’t have enough air, they flex more as they roll, generating heat and accelerating wear and tear. Check your tire pressure at least once a month and before any long trips. You can find the recommended pressure on the sticker inside your driver’s side door jamb or in your vehicle’s owner’s manual.

In addition to underinflation, overloading your vehicle can also take a toll on your tires. Each tire has a load rating, which indicates the maximum weight it can safely support. Exceeding this rating can lead to rapid and uneven wear, as well as increased risk of tire failure. Distribute cargo weight evenly across your vehicle and follow the recommended load limits to ensure your tires stay in tip-top shape.

Speaking of even wear, regular tire rotations are key. Front and rear tires wear differently, so rotating them according to your vehicle manufacturer’s recommendation helps ensure they wear evenly. This not only extends the life of your tires but also maintains better handling and traction. It’s a simple step that can make a big difference.

While we’re on the topic of wear, keep an eye on your tire tread. Tire tread depth is crucial for traction, especially in wet or slippery conditions. Use a quarter to check your tread depth – insert it into the tread groove with Washington’s head upside down. If you can see the top of Washington’s head, it’s time to replace your tires.

When it comes to tire maintenance, don’t forget the valve caps. They may seem insignificant, but they play an important role in keeping debris and moisture out of your tire valves, maintaining proper pressure, and preventing leaks. Always replace the valve caps securely after checking or adjusting your tire pressure.

Proper wheel alignment is another important factor in tire care. Misaligned wheels can lead to uneven and accelerated tire wear, as well as handling issues. If you notice unusual wear patterns on your tires or if your vehicle pulls to one side while driving, have your wheel alignment checked by a professional.

In addition to these maintenance measures, driving habits can also impact tire life. Harsh braking, rapid acceleration, and speeding can all contribute to increased tire wear. Smooth and gentle driving not only keeps your tires in better condition but also improves fuel efficiency and overall vehicle performance.

Remember, investing in quality tires is worth it in the long run. While cheaper tires may seem like a bargain upfront, they often don’t last as long and may require more frequent replacements. Choose tires with a good reputation for durability and performance to get the most bang for your buck.

Taking care of your tires doesn’t have to be complicated or time-consuming. By simply following the advice outlined above, you can extend the life of your tires, improve fuel efficiency, and ultimately save money. So, make sure to give your tires a little love – they’ll thank you for it!

In conclusion, tire care is not just about safety – it’s also about being a savvy vehicle owner. By checking your tire pressure regularly, maintaining proper inflation, rotating your tires, monitoring tread wear, and adopting gentle driving habits, you can extend the life of your tires and postpone replacement costs. Don’t forget the impact of quality tires and proper wheel alignment, too. With these simple steps, you’ll be rolling towards savings and enjoying a smoother ride. Happy travels!

BuzzFeed News and The Washington Post remind readers to always consult a certified mechanic or tire specialist for specific advice regarding their vehicle’s tire care needs.

Now, let’s answer some common questions on this topic:

**How often should I rotate my tires?**

It’s generally recommended to rotate your tires every 5,000 to 8,000 miles, or at the interval specified in your vehicle’s owner’s manual. Front and rear tires wear differently, so regular rotation ensures even wear and prolongs the life of your tires.

**What causes tire pressure to decrease over time?**

Several factors contribute to the loss of tire pressure over time, including the natural permeability of the tire rubber, changes in temperature, and minor leaks from the valve stem or core. That’s why it’s important to check your tire pressure regularly and adjust it as needed to maintain the recommended PSI.

**Are there any tire care products that can help extend tread life?**

Yes, there are tire sealants and inflators on the market that can be helpful in emergency situations, such as a flat tire. These products can temporarily seal small punctures and leaks, allowing you to safely drive to a repair shop. However, they are not a permanent solution and should not replace proper tire maintenance.

**How do I know if my tires need to be replaced?**

In addition to checking tread depth with the quarter test, look out for other signs of tire wear, such as cracks or bulges in the sidewalls, uneven wear patterns, or excessive vibration while driving. If you notice any of these issues, it’s best to have your tires inspected by a professional.

**What are the consequences of driving with underinflated tires?**

Underinflated tires can lead to increased rolling resistance, generating heat and accelerating tire wear. This not only shortens the life of your tires but also impacts your vehicle’s fuel efficiency and handling, increasing your overall costs.

By following the advice in this article and maintaining proper tire care, you can keep your vehicle running smoothly and safely while also saving money at the pump and postponing tire replacement expenses.

Stranded? 5 Car Repairs You Can Do with Household Items

**Stranded? You Can Do These Temporary Car Repairs with Household Items**

Car trouble is never convenient, but it can be especially frustrating when you’re stranded on the side of the road, miles from a repair shop. While some car problems require a mechanic’s expertise, there are several common issues that you may be able to temporarily fix yourself using everyday household items. Here are five car repairs you can attempt in a pinch:

1. **Flat Tire:** A flat tire is one of the most common car troubles, and it can leave you stranded if you don’t have a spare. If you find yourself with a slow leak or a small puncture, you might be able to temporarily fix it using a plastic bottle and a screw. Simply remove the screw from the cap of a water or soda bottle and screw it into the hole in your tire. The plastic will act as a temporary plug, allowing you to inflate the tire and get back on the road. Of course, this is not a permanent solution, and you should still get your tire professionally repaired or replaced as soon as possible.

2. **Dead Battery:** A dead battery is another common issue that can leave you stranded. If you have access to another vehicle, you can try jump-starting your car with household items. You’ll need a pair of jumper cables and a working car with a similar voltage battery. Connect one end of the jumper cables to the positive and negative terminals on your dead battery, and the other end to the corresponding terminals on the working battery. Start the working car and let it run for a few minutes before attempting to start your car. If successful, you should be able to get your car running long enough to reach a repair shop or replace the battery.

3. **Broken Tail Light:** A broken tail light is not only a safety hazard, but it can also result in a ticket. If one of your tail lights burns out, you can temporarily replace it with a household lightbulb. Just make sure the bulb you use is the correct voltage and base type to fit your tail light housing. While this fix will restore visibility, be sure to purchase the correct bulb type and have it professionally installed as soon as possible.

4. **Leaky Radiator:** A leaky radiator can lead to overheating and serious engine damage if left unattended. In an emergency, you can temporarily seal small leaks using common household items like eggs or black pepper. Simply crack open an egg and separate the yolk from the white. Beat the egg white until it’s frothy, and then pour it into the radiator. The egg white will cook when it comes into contact with the hot engine, creating a temporary seal. Alternatively, you can mix black pepper with water to create a paste and apply it to the leak. These methods will only work for small leaks, so be sure to get your radiator properly repaired or replaced as soon as possible.

5. **Clogged Fuel Filter:** A clogged fuel filter can cause your car to stall or run erratically. While it’s best to have a mechanic diagnose and replace the filter, you may be able to temporarily improve fuel flow using a household solvent like rubbing alcohol. Add a small amount of rubbing alcohol to your fuel tank, following the recommended mixture ratios for your specific vehicle. The alcohol will help dissolve and remove any built-up deposits or contaminants in the fuel system, improving fuel flow and potentially restoring your car’s performance. However, this is not a long-term solution, and you should still seek professional maintenance for a thorough cleaning and fuel filter replacement.

Remember, these are temporary fixes to get you out of a bind and should not replace proper maintenance and repairs by a qualified mechanic. Keep a cool head, and with these simple repairs, you might just get yourself back on the road. Stay safe, and happy driving!

Winter Warrior: 8-Point Checklist to Prep Your Car for Cold

As the chilly winter season approaches, it’s important to ensure your vehicle is prepared for the cold weather ahead. Cold temperatures, snow, and ice can take a toll on your car, so taking some preventative measures can help ensure safe driving and keep maintenance costs at bay. Here is a comprehensive eight-point checklist to get your car ready for the winter months ahead.

First and foremost, the health of your car’s battery is crucial in the winter. Cold temperatures can reduce a battery’s cranking power, making it work harder to start your vehicle. Get your battery tested to ensure it has enough juice to last through the winter. If it’s more than three years old, consider replacing it proactively to avoid being stranded with a dead battery in freezing temperatures.

Fluids are the lifeblood of your car, and they require special attention in winter. Top up your coolant and consider switching to a lower viscosity oil, as thinner oil pumps more easily in cold temperatures and helps your engine start faster. Don’t forget to also check your brake, power steering, and windshield washer fluids to ensure they’re at optimal levels.

The importance of a well-maintained heating and defrosting system cannot be overstated during winter. Check that your heater and defroster are working properly to ensure optimal visibility and comfort during your drives. Also, make sure all vents are clear of debris or leaves to enable uninterrupted airflow.

As the seasons change, so should your tires. Switching to winter or all-season tires will provide better traction on snowy and icy roads. Winter tires have specialized tread patterns and rubber compounds designed for superior performance in cold temperatures, providing a safer driving experience.

Brakes are a critical safety feature, especially in winter driving conditions. Have your brake pads, rotors, and brake fluid checked to ensure they’re in good condition and able to withstand the challenges of winter driving. Remember, brake performance directly impacts your ability to stop safely on slippery roads.

The cold months bring shorter daylight hours, so it’s essential to ensure your lights are in working order. Check your headlights, taillights, turn signals, and emergency lights to ensure they’re bright and functional. This will increase your visibility to other drivers and help you navigate safely through wintery conditions.

Wiper blades endure a lot during the winter, from clearing ice and snow to combating salty spray. Replace them with winter-specific blades designed to withstand freezing temperatures and prevent snow or ice buildup. Also, fill your washer fluid reservoir with a winter washer fluid that won’t freeze or streak your windshield.

Being prepared for emergencies is crucial during winter drives. Pack an emergency kit for your car that includes items like a small first aid kit, a flashlight with extra batteries, a small snow shovel, an ice scraper, a blanket, non-perishable snacks, and a basic tool kit. It’s better to be over-prepared and not need these supplies than to be caught off guard.

By diligently working through this checklist, you can rest assured that your car is ready to tackle the challenges of winter. From maintaining optimal performance to ensuring your safety on icy roads, these preventative measures will make your winter driving experience much more enjoyable and stress-free. So, don’t delay, get started today and become a winter warrior behind the wheel.

Spring Cleaning: Rejuvenate Your Car After Winter’s Wrath

As the days lengthen and the sun’s warmth returns, it’s time to emerge from our winter cocoons and embrace the season of renewal. For car owners, this means it’s the perfect opportunity to give your vehicle some much-needed attention after the cold, harsh months. Spring cleaning isn’t just for your home—it’s also an excellent time to rejuvenate your car and ensure it’s in top shape for the adventures that lie ahead. Here’s a comprehensive guide to help you breathe new life into your car this spring.

Start by giving your car a thorough cleaning, both inside and out. Winter weather can leave a car looking drab and dirty, with road salt, mud, and grime building up over the colder months. Treat your car to a deep clean, including a wash, wax, and interior vacuuming and detailing. Don’t forget to pay attention to often-overlooked areas like the door jambs, trunk, and under the seats. A clean car feels like new again and gives you a sense of pride as you hit the open road.

Next, turn your attention to the engine and mechanical components. Cold temperatures and winter driving conditions can take a toll on your car’s performance and reliability. Schedule a tune-up with a trusted mechanic to ensure your vehicle is running smoothly and efficiently. This should include checking fluid levels, inspecting belts and hoses, and replacing any worn or damaged parts. Regular maintenance is key to extending the life of your car and preventing unexpected breakdowns.

The harsh winter sunlight can also take a toll on your headlights, making them appear cloudy and dull. Not only does this affect the aesthetics of your car, but it can also reduce visibility when driving at night. Consider restoring your headlights to improve their clarity and brightness. Headlight restoration kits are available at most auto parts stores, or you can have a professional detailer handle the job for you.

As the seasons change, so should your tires. If you’re driving on winter or all-season tires, consider switching to a set of summer tires. Summer tires offer improved performance in warmer temperatures, providing better traction, handling, and a smoother ride. They’re designed to perform optimally on dry and wet roads, so you can enjoy more responsive and safer driving.

While you’re at it, don’t forget to check your tire pressure regularly. Properly inflated tires improve fuel efficiency, extend the life of your tires, and enhance your vehicle’s handling and braking. You can find the recommended tire pressure for your car on a sticker inside the driver’s door or in the owner’s manual.

Spring is also the perfect time to address any cosmetic issues your car may have endured over the winter. From scratches and dents to cracked windshields and faded paint, now is the time to tackle these problems head-on. Minor repairs can often be handled at home with the right tools and guidance from online resources. For more significant damage, it’s best to consult a professional body shop to get your car looking its best again.

The changing seasons bring varying temperatures, and it’s important to ensure your car’s heating, ventilation, and air conditioning (HVAC) system is up to the task. Test your air conditioning to make sure it’s blowing cold air efficiently. If it’s not performing as it should, you may need to recharge the refrigerant or have the system inspected for leaks. A well-functioning HVAC system keeps you comfortable and maintains good air quality inside your vehicle.

As you prepare for longer drives and road trips in the warmer months, it’s crucial to inspect your car’s safety features. Check that all lights are functional, including headlights, taillights, turn signals, and hazard lights. Ensure your windshield wipers are in good condition, replacing them if they leave streaks or miss spots. Also, test your horn, and don’t forget to restock your emergency kit with items like flares, a first aid kit, and a spare tire.

Lastly, spring cleaning extends beyond the physical aspects of your car. It’s an excellent opportunity to organize and digitize your important vehicle-related documents. Gather all your car’s paperwork, including the owner’s manual, maintenance records, insurance information, and registration documents. Scan and save digital copies to a secure cloud storage service, making them easily accessible whenever you need them.

Spring cleaning your car goes beyond aesthetics; it’s about ensuring your vehicle is safe, reliable, and ready for the adventures that lie ahead. By following these tips, you’ll not only improve the appearance and performance of your car but also extend its lifespan and maintain its resale value. So roll up your sleeves, grab your cleaning supplies, and embrace the spirit of renewal this season. Your car will thank you for it!

As you embark on your spring cleaning journey, remember to take a step-by-step approach. Start with the interior and exterior cleaning, then move on to mechanical inspections and maintenance tasks. Address cosmetic issues and don’t neglect your car’s safety features and documentation. By breaking down the process into manageable tasks, you’ll soon have your car feeling like new again. Happy spring cleaning!

Featured image: Car being washed (Photo by Cameron Casey on Unsplash)