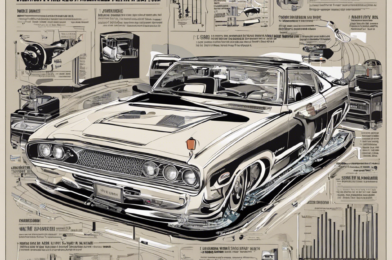
Summer-Ready Ride: 6 Essential Tips for Hot Weather Driving

Summertime is all about fun and adventure, but it’s important to ensure your vehicle is ready for the heat. High temperatures can take a toll on both your car and your driving experience if you’re not prepared. Here are six essential tips to get your car summer-ready and ensure a safe and comfortable journey during the hottest months.

**1. Check Your Fluids**

The hot weather can be hard on your car’s engine, so it’s crucial to ensure all fluids are topped up. This includes engine oil, coolant, brake fluid, power steering fluid, and windshield washer fluid. Check your owner’s manual for the recommended type and grade of oil for your vehicle, and remember to check fluid levels regularly, especially before a long trip. Coolant, in particular, is vital as it prevents your engine from overheating. Look for a coolant that offers corrosion protection and has a boiling point suitable for the climate you’ll be driving in.

**2. Inspect Your Tires**

Tire pressure increases as the temperature rises, so it’s important to check your tire pressure regularly during the summer months. Overinflated tires can be a safety hazard and can also wear out faster. Check your owner’s manual or the sticker on the driver’s side door jamb for the recommended tire pressure for your vehicle. While you’re at it, inspect your tires’ tread depth and overall condition. Replace them if they show signs of excessive wear or damage. Don’t forget to check your spare tire as well, ensuring it’s properly inflated and ready for any emergencies.

**3. Test Your Air Conditioning**

A functional air conditioning system is a must-have during summer. Ensure your AC is working properly by testing it before the hot weather sets in. If it’s not cooling effectively, have it checked by a professional. This may involve re-gassing the system or addressing any leaks. Also, remember to change your cabin air filter regularly. This filter prevents dust, pollen, and other allergens from entering your vehicle, ensuring the air circulating inside remains clean and fresh.

**4. Protect Your Interior**

The sun’s UV rays can be just as harsh on your car’s interior as they are on your skin. Over time, they can cause fading, cracking, and other damage to your dashboard, seats, and steering wheel. Invest in a good-quality sunshade to protect your dashboard when your car is parked. You can also use sunshades on your side windows for added protection. If you have leather seats, condition them regularly to prevent cracking and keep them comfortable to sit on, even when they’re hot.

**5. Pack an Emergency Kit**

Breakdowns can happen at any time, and summer is no exception. Make sure you have an emergency kit tailored for the summer months. This should include items such as a flashlight with fresh batteries, a first aid kit, jumper cables, a basic tool kit, a fire extinguisher, a reflective warning triangle, and a portable cellphone charger. Also, consider adding some summer-specific items like sunscreen, insect repellent, a small fan, and extra water bottles to keep you cool while you wait for assistance.

**6. Plan for Summer Destinations**

Summer often involves road trips and exploring new places. Make sure you plan your route in advance, taking into account any potential traffic hotspots or road closures due to summer events or construction. Know where the gas stations, rest stops, and service centers are along your route. If you’re heading off-road or to a remote area, ensure your vehicle is equipped for the terrain and that someone knows your intended route and estimated time of arrival.

In conclusion, a little preparation goes a long way in ensuring your summer driving experiences are safe and enjoyable. By following these essential tips, you can confidently hit the road and make the most of the sunny season. So, get your vehicle summer-ready and embrace the adventure that awaits!

Remember to stay vigilant about vehicle maintenance and always be prepared for the unexpected, especially when driving in hot weather. Happy summer travels!

Jumpstart Genius: Never Get Stuck with a Dead Battery Again

Jumpstart Genius is revolutionizing the way we handle car battery emergencies with its innovative and convenient solution. Say goodbye to the stress and hassle of dealing with a dead battery, as Jumpstart Genius provides a reliable and effortless way to get back on the road in no time.

We’ve all been there – that moment of panic when you turn the key in the ignition and nothing happens. A dead car battery can happen to anyone, whether it’s due to leaving the lights on, a faulty battery, or simply not driving your car often enough. It’s a frustrating and inconvenient situation that can leave you stranded and late for your commitments. But with Jumpstart Genius, you can kiss those days goodbye!

Jumpstart Genius offers a brilliant solution to this common problem. Their portable and compact jump starter is a game-changer, providing a powerful boost to get your car back up and running within minutes. No more waiting for a tow truck or relying on the kindness of strangers; with Jumpstart Genius, you are empowered to handle the situation yourself.

The jump starter is lightweight and easy to store in your glove compartment or trunk, ensuring it’s always there when you need it. With a simple set of instructions, anyone can use it safely and effectively. It’s as easy as connecting the clamps to your car battery and pressing the power button. Within seconds, your car will roar back to life, and you’ll be back on the road, feeling like a genius!

But Jumpstart Genius offers more than just a convenient product. They provide peace of mind and a sense of security. With their jump starter in your car, you can confidently embark on any journey, knowing that a dead battery won’t ruin your plans. It’s like having your very own personal mechanic on standby, ready to save the day at a moment’s notice.

The jump starter is not just powerful but also smart. It comes equipped with advanced safety features that ensure a secure connection and protect your car’s electrical system. Overcurrent and spark-proof technology prevent any damage to your vehicle, while reverse polarity protection eliminates the risk of incorrect connections. With Jumpstart Genius, you can boost your car safely and confidently.

In addition to its primary function, the jump starter also serves as a portable power bank, complete with USB ports to charge your electronic devices on the go. So, not only can you get your car running, but you can also stay connected and charged wherever your adventures take you. It’s like having a portable power station right at your fingertips!

The convenience and reliability offered by Jumpstart Genius extend beyond the product itself. They provide exceptional customer support, ensuring that users have a positive experience and can fully utilize their jump starter. Their team is dedicated to answering any questions or concerns, providing step-by-step guidance, and ensuring customer satisfaction every step of their journey.

Jumpstart Genius’s commitment to innovation doesn’t stop with their jump starter. They continuously push the boundaries, developing new and improved versions to ensure their customers have access to the latest and greatest technology. Their dedication to research and development means that drivers everywhere can benefit from enhanced performance, features, and design with each new release.

The Jumpstart Genius team is comprised of passionate individuals who understand the frustration of a dead car battery and are dedicated to providing a reliable solution. Through their own personal experiences, they recognize the need for a convenient, effective, and safe product that anyone can use. Their shared passion drives them to create a product that empowers drivers everywhere.

Jumpstart Genius is not just a product but a community of empowered individuals who no longer fear the dreaded dead battery. Their website and social media channels foster a space for drivers to share their experiences, offer tips and tricks, and celebrate the freedom and confidence that comes with being a part of the Jumpstart Genius family. It’s more than a purchase; it’s a community of like-minded individuals.

With the holiday season approaching, Jumpstart Genius is offering exclusive deals and discounts to make their innovative product even more accessible. It’s the perfect time to gift yourself or a loved one with the assurance of never having to deal with a dead battery again. You can also enjoy peace of mind, knowing that their responsive customer support team is always ready to help.

So, why wait for a battery emergency to strike? Invest in a Jumpstart Genius today, and transform the way you handle car troubles. With its portable, powerful, and safe design, you’ll never have to worry about a dead battery again. It’s time to boost your confidence and hit the road with peace of mind as your trusted companion. Jumpstart Genius – your genius solution for a genius drive.

To learn more about Jumpstart Genius and their game-changing product, visit their website or follow them on social media to stay up-to-date with the latest offers and testimonials from satisfied customers. Don’t let a dead battery hold you back – join the revolution and experience the freedom of the genius drive!

Timing Belt Replacement: Avoid Disaster with This Crucial Repair

**Timing Belt Replacement: Why You Shouldn’t Delay This Crucial Car Repair**

For car owners, keeping their vehicle in good shape is essential, but it can also be a daunting task. Many components make up the intricate machinery of a car, and one of the most crucial, yet often overlooked, parts is the timing belt. This rubber belt with reinforced fibers plays a critical role in keeping your car’s engine running smoothly, and its failure can lead to a disastrous and costly outcome.

The timing belt is responsible for synchronizing the rotation of the crankshaft and camshaft, ensuring that the engine’s valves open and close at precisely the right time. This synchronization is critical to the engine’s internal combustion process, and any misalignment can result in serious damage. Despite its importance, the timing belt is subjected to tremendous stress and eventually wears out, requiring replacement.

Replacing a timing belt is not a simple task and should be left to qualified mechanics. The process involves disassembling significant parts of the engine to access the belt, and it requires knowledge, specialized tools, and experience. Depending on the make and model of your car, the recommended interval for timing belt replacement can vary between 60,000 and 100,000 miles. However, it is important to consult your car’s manual or a trusted mechanic to determine the optimal replacement interval for your specific vehicle.

It is crucial not to delay this essential repair. A timing belt failure can have catastrophic consequences. If the belt snaps while the engine is running, the camshaft and crankshaft will go out of sync, causing the pistons to hit the open valves. This can lead to severe engine damage, including bent valves, damaged pistons, and even destruction of the cylinder head. Such extensive damage can cost thousands of dollars to repair, and in some cases, it may be more economical to replace the entire engine.

Additionally, a broken timing belt can leave you stranded in remote locations, causing inconvenience and safety concerns. It is also worth noting that replacing a timing belt presents an opportunity to inspect and replace other critical engine components. For example, the water pump, which circulates coolant to maintain the engine’s temperature, is often driven by the timing belt. Since accessing the water pump typically requires the same labor-intensive process as replacing the timing belt, it makes sense to replace it simultaneously to prevent future issues.

Other components that may be worth replacing during a timing belt job include the tensioner, idler pulleys, and serpentine belt. By proactively replacing these parts, you can enhance the reliability of your vehicle and reduce the likelihood of unexpected breakdowns. It is always better to be safe than sorry when it comes to your car’s maintenance. Therefore, keeping a close eye on the condition of your timing belt and adhering to the recommended replacement interval is of utmost importance.

The consequences of neglecting this critical repair can be far-reaching and expensive. By investing in a timely replacement, you can avoid the hassle, danger, and financial burden associated with a broken timing belt. Regular maintenance of your vehicle, including timely replacement of the timing belt, showcases responsible car ownership and contributes to a safer and more reliable driving experience.

So, if you’re approaching the recommended replacement interval for your timing belt, don’t delay. Contact a trusted mechanic and schedule the repair as soon as possible. It could save you from a world of hurt and expense down the road. Remember, proactive maintenance is the key to keeping your car in optimal condition and ensuring your peace of mind while on the road.

Alternator Swap: Step-by-Step Guide to Powering Up Your Ride

The alternator is the heart of your car’s electrical system, keeping the battery charged and powering all the vital components. But what happens when your alternator fails or you want to upgrade to a higher-output unit? Swapping out your alternator can be a daunting task for any car enthusiast, but with the right tools and know-how, you can do it yourself and give your ride a powerful upgrade. In this step-by-step guide, we’ll take you through the process of performing an alternator swap, covering everything from safety precautions to testing your new setup. So, whether you’re looking to replace a faulty alternator or just want to boost your electrical system’s performance, read on for a comprehensive walkthrough.

Before we dive into the steps, it’s important to prioritize safety. Always wear safety goggles and gloves when working on your car, and ensure you have a fire extinguisher nearby. Begin by parking your car on a level surface, engaging the parking brake, and removing the keys from the ignition. Now, let’s get started!

Step 1: Disconnect the Battery

First, you’ll need to disconnect the battery. Locate the negative battery terminal and loosen the retaining bolt using a wrench. Once loose, carefully lift the cable away from the battery post and secure it to one side, ensuring it doesn’t touch any metal surfaces. Then, do the same for the positive terminal.

Step 2: Remove the Serpentine Belt

The serpentine belt drives multiple accessories in your engine bay, including the alternator. To remove it, locate the tensioner pulley and use a wrench or serpentine belt tool to release the tension. You may need to rotate the tensioner clockwise or counterclockwise, depending on your vehicle. Once the tension is released, carefully lift the belt off the alternator pulley.

Step 3: Unbolt the Old Alternator

With the belt removed, you’ll now have access to the alternator. Using the appropriate socket or wrench, unbolt the alternator from the bracket and engine block. There may be three or four bolts holding it in place. Once the bolts are removed, carefully lift the alternator out of the engine bay.

Step 4: Prepare the New Alternator

Before installing the new alternator, inspect it for any signs of damage and ensure it matches your vehicle’s specifications. Some high-output alternators may require additional brackets or modifications, so refer to the manufacturer’s instructions. If your new alternator came with a new pulley, install it now.

Step 5: Install the New Alternator

Carefully position the new alternator into place, ensuring it sits securely within the bracket. Thread the bolts by hand first, and then tighten them with your wrench or socket. Torque the bolts to the manufacturer’s specifications, following a star or crisscross pattern to ensure even tension.

Step 6: Reinstall the Serpentine Belt

Route the serpentine belt back onto the relevant pulleys, ensuring it sits correctly on each one. Once in place, release the tensioner and allow it to take tension on the belt. Double-check that the belt is properly aligned and cannot slip off any of the pulleys.

Step 7: Reconnect the Battery

Now, reconnect the positive battery terminal first, tightening the retaining bolt securely. Then, reconnect the negative terminal and ensure both connections are secure and free of corrosion.

Step 8: Test the New Alternator

With the battery reconnected, start your car and let it idle. Check that the new alternator is working by observing the voltage at the battery terminals with a multimeter. You should see around 14 volts with the engine running. Also, check for any unusual noises coming from the alternator.

Step 9: Road Test and Final Checks

Take your car for a short drive and listen for any unusual noises or signs of malfunction. Back in your garage, perform a final inspection of all connections and bolts, ensuring nothing was missed during the installation.

Step 10: Enjoy Your Upgraded Electrical System!

Congratulations! You’ve successfully performed an alternator swap, and your car now has a more powerful electrical system. This upgrade will provide benefits such as improved charging capabilities and support for additional electronic accessories.

We hope you found this step-by-step guide helpful. Remember, always refer to vehicle-specific instructions and safety guidelines when working on your car. Stay tuned for more automotive DIY projects and keep your ride powering ahead!

(WordPress formatting: To create paragraphs in WordPress, simply press “Enter” to start a new paragraph. No additional formatting is required. The WordPress editor will automatically format your content into paragraphs.)

Fluids Check: Your Monthly Guide to Car Health

# Fluids Check: Your Monthly Guide to Car Health

We all rely on our vehicles to get us safely and smoothly from point A to point B. Whether it’s a daily commute, road trips, or running errands, our cars endure a lot. Thus, it’s essential to implement some routine checks and maintenance to prolong their lifespan and ensure optimal performance.

One of the most important, yet often overlooked, aspects of car care is fluid maintenance. The various liquids in your vehicle play critical roles in lubrication, cooling, and ensuring the overall health of its components. Therefore, conducting a comprehensive fluid check should be a priority on your car maintenance checklist.

## Engine Oil: The Lifeblood of Your Car

Engine oil is undoubtedly the most well-known and frequently checked fluid. It acts as the lifeblood of your car, providing lubrication to the moving parts of the engine. Regular oil changes are crucial to remove sludge and contaminants and replenish the engine with fresh oil. Most cars today recommend changing the oil every 5,000 to 7,500 miles or every six months, whichever comes first. Check your owner’s manual for the specific oil change interval for your vehicle.

## Coolant: Keeping Your Engine Cool

Coolant, also known as antifreeze, is essential for regulating the temperature of your engine. It prevents overheating in the summer and freezing in the winter, thus maintaining the engine’s optimal operating temperature. It’s advisable to check your coolant level periodically and look for any leaks. A coolant flush and refill are typically recommended every two years or 30,000 miles.

## Brake Fluid: Safety First

Brake fluid is crucial for the proper functioning of your car’s braking system. When you press the brake pedal, the brake fluid transmits that force to the brakes, allowing them to engage and slow down the vehicle. Over time, the fluid can absorb moisture, leading to a reduction in its boiling point and potential brake fade. It is vital to replace the brake fluid as per the manufacturer’s recommendation, typically every two years or when its condition deteriorates.

## Power Steering Fluid: Steering with Ease

The power steering fluid assists in making steering effortless. It helps transfer the force exerted on the steering wheel to the steering mechanism, making it easy to turn the wheels. Check the power steering fluid level regularly and top it off as needed. Most car manufacturers recommend a power steering fluid flush every 50,000 to 100,000 miles.

## Transmission Fluid: Smooth Gear Shifts

Transmission fluid enables smooth and seamless gear shifts in both automatic and manual transmission vehicles. It lubricates the moving parts of the transmission and helps transfer power from the engine to the wheels. Check the fluid level and condition according to the guidelines in your owner’s manual. Transmission fluid changes are generally recommended every 30,000 to 60,000 miles for automatic transmissions and every 30,000 to 50,000 miles for manual transmissions.

## Windshield Washer Fluid: Clarity While Driving

Though not directly linked to engine performance, windshield washer fluid is essential for maintaining a clear field of vision while driving. It helps remove dirt, bugs, and grime from your windshield, ensuring safe driving conditions. Check the washer fluid level regularly and refill it as needed, especially before long trips or during winter months when road spray and salt can obscure your vision.

In conclusion, implementing a monthly fluid check routine is a simple yet effective way to ensure your car’s longevity and dependable performance. By staying on top of fluid maintenance, you can avoid costly repairs and unexpected breakdowns. Mark your calendars, set reminders, and make fluid checks a habit for optimal car health!

Remember to always refer to your vehicle’s owner’s manual for specific recommendations and guidelines regarding fluid types, capacities, and service intervals.

### Additional Fluids to Monitor:

– Battery fluid (in lead-acid batteries)
– Differential fluid
– Transfer case fluid (for four-wheel/all-wheel-drive vehicles)
– Air conditioning refrigerant

Each of these fluids plays a crucial role in the overall performance and longevity of your vehicle, so be sure to include them in your car maintenance routine!

Now you’re well-equipped with the knowledge to keep your car’s fluids in check. Happy driving!